Quick Order Page
Everything your B2B buyers can do on the quick order page.
1. Overview
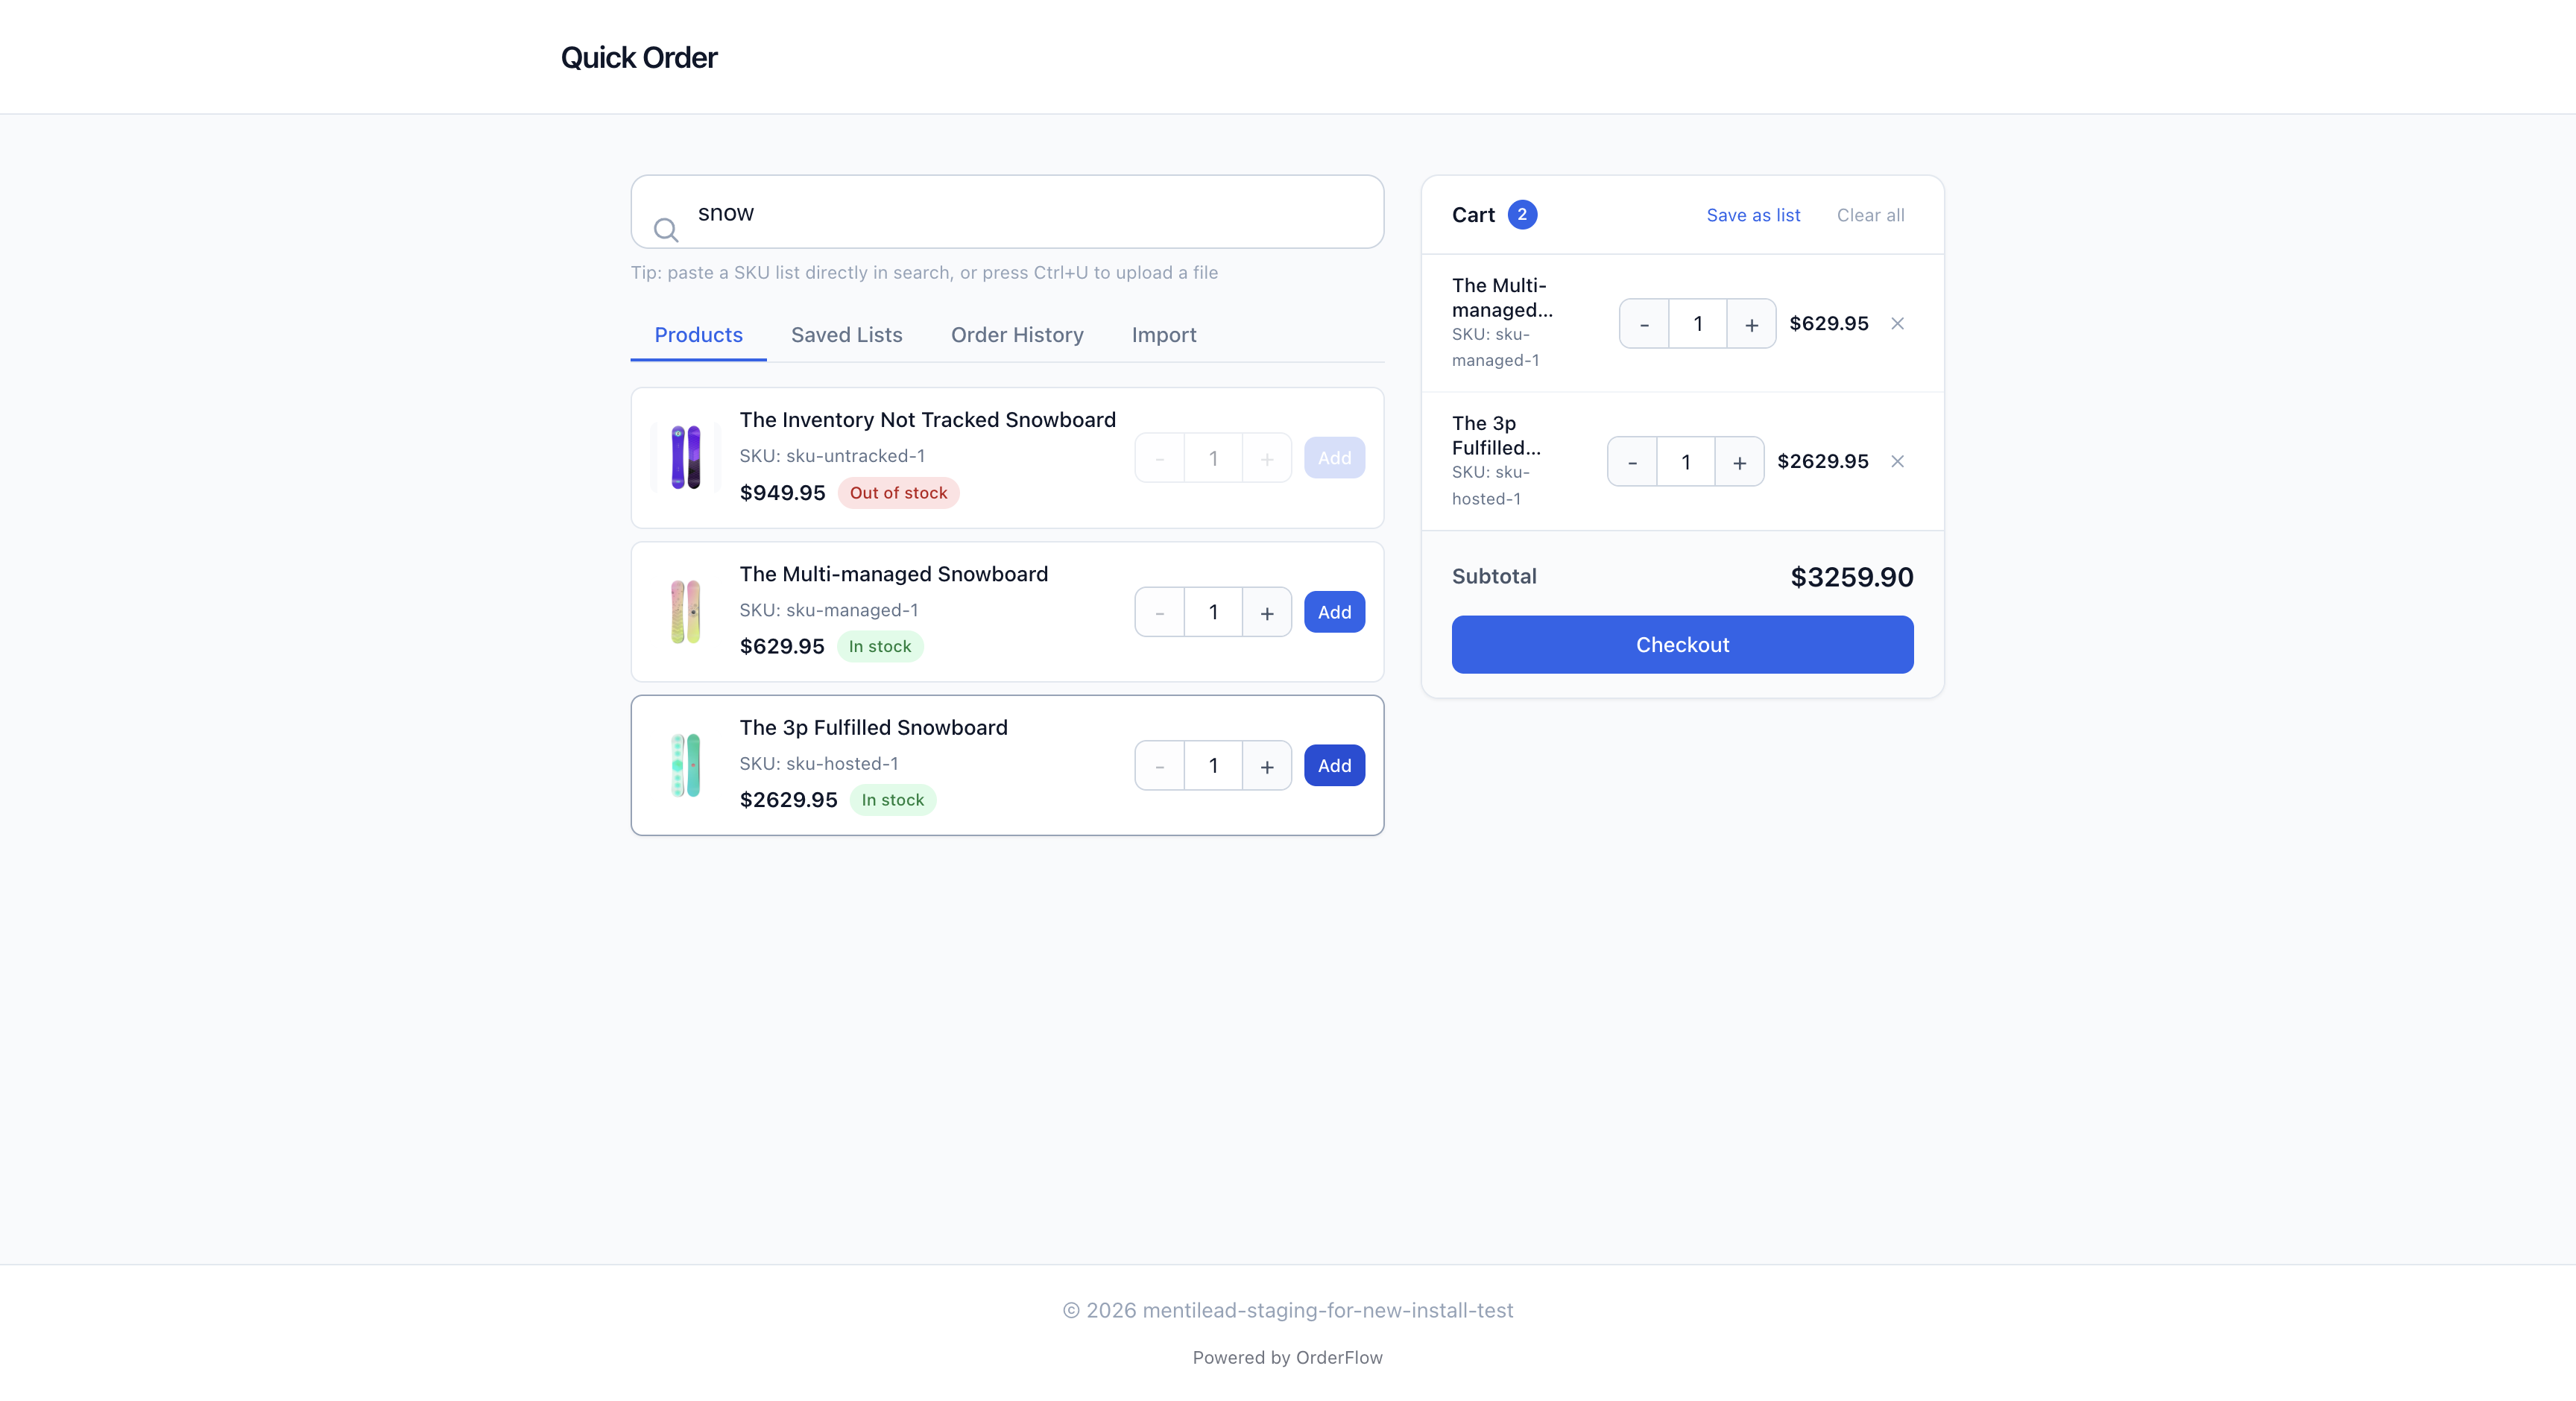
The quick order page lives on your storefront at your-store.myshopify.com/apps/orderflow. It uses a unified single-page layout with a search bar at the top, contextual content sections (Frequently Ordered, Saved Lists, Order History), and a sticky cart sidebar on desktop.
The page runs through Shopify's App Proxy, so it appears on your domain with your theme's header and footer wrapping it. This means customers see a consistent experience — the quick order page feels like a native part of your store, not an external tool. No separate login is required because the customer's Shopify session carries over automatically.
The layout is designed for speed. B2B buyers often know exactly what they need — they want to search by SKU, set quantities, and check out as fast as possible. The search bar is front and center, results appear instantly, and the cart sidebar gives a running total without navigating away from the product list.
Every interaction on the quick order page is built for efficiency. Keyboard shortcuts let power users fly through orders without touching the mouse. CSV upload handles bulk imports in seconds. Saved lists turn weekly repeat orders into a single click. The goal is to make B2B ordering faster than any other method your customers have used before.
2. Product Search
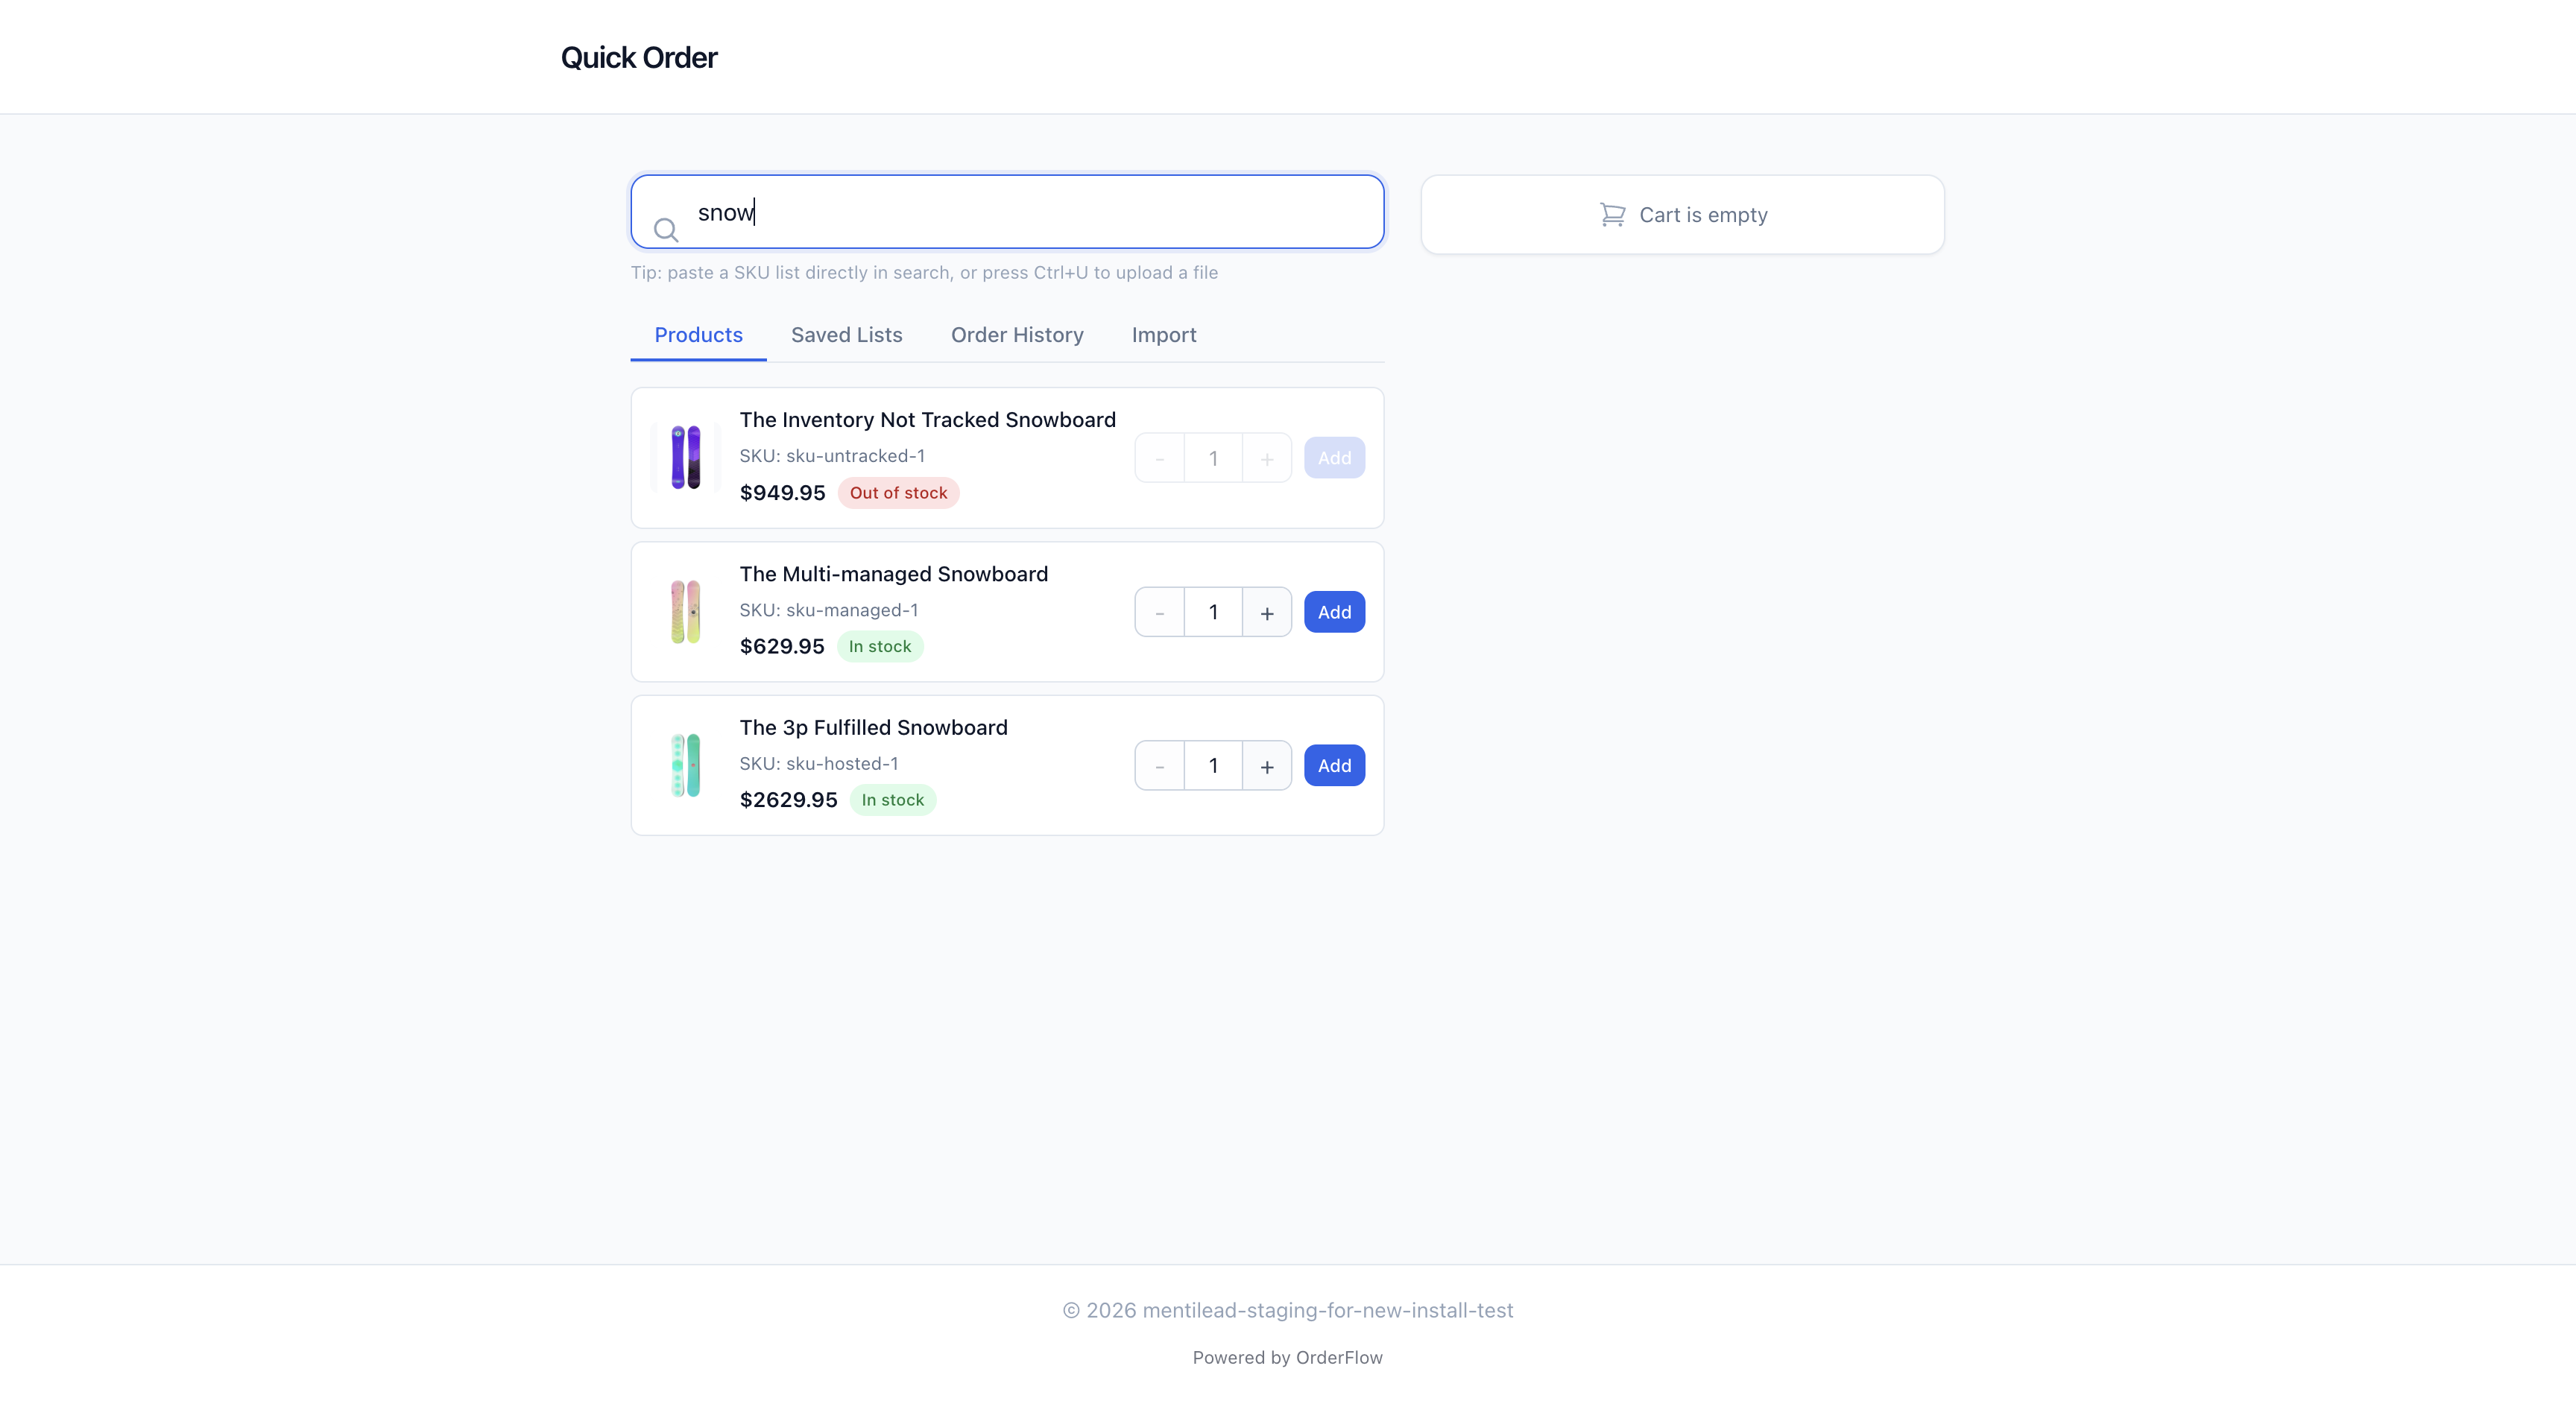
The search bar is always visible at the top and is the primary way customers find items. It provides instant search across your entire catalog by SKU or product name. As the customer types, results appear immediately — no need to press Enter or wait for a page reload. Recent searches are saved for quick access.
Each result appears as a product card showing: product image, title, SKU, variant selector (if the product has multiple variants), price, stock status badge (In Stock, Low Stock, or Out of Stock), a quantity stepper with plus/minus buttons, and an Add button. Out-of-stock items are still visible in search results so customers know the product exists, but the Add button is disabled with a clear visual indicator.
Search supports partial matches — typing "WID" finds "Widget Pro", "Wide Bracket", and any other product containing those characters. This is especially useful for long SKU codes where customers remember only part of the identifier. The search algorithm prioritizes exact SKU matches first, then partial SKU matches, then product name matches.
Keyboard users can press / to focus the search bar from anywhere on the page, and Escape to clear the current search. Multi-line paste detection is also built in: if you paste multiple SKUs (one per line) from a spreadsheet, OrderFlow automatically switches to the Import tab and processes them as a bulk import.
3. Saved Lists
Standard + Plus plans
Saved Lists let customers save their current cart as a named list for future use. This is one of the most popular features for B2B buyers who place the same or similar orders on a regular schedule — a restaurant ordering weekly supplies, a contractor restocking materials, or a retailer replenishing inventory.
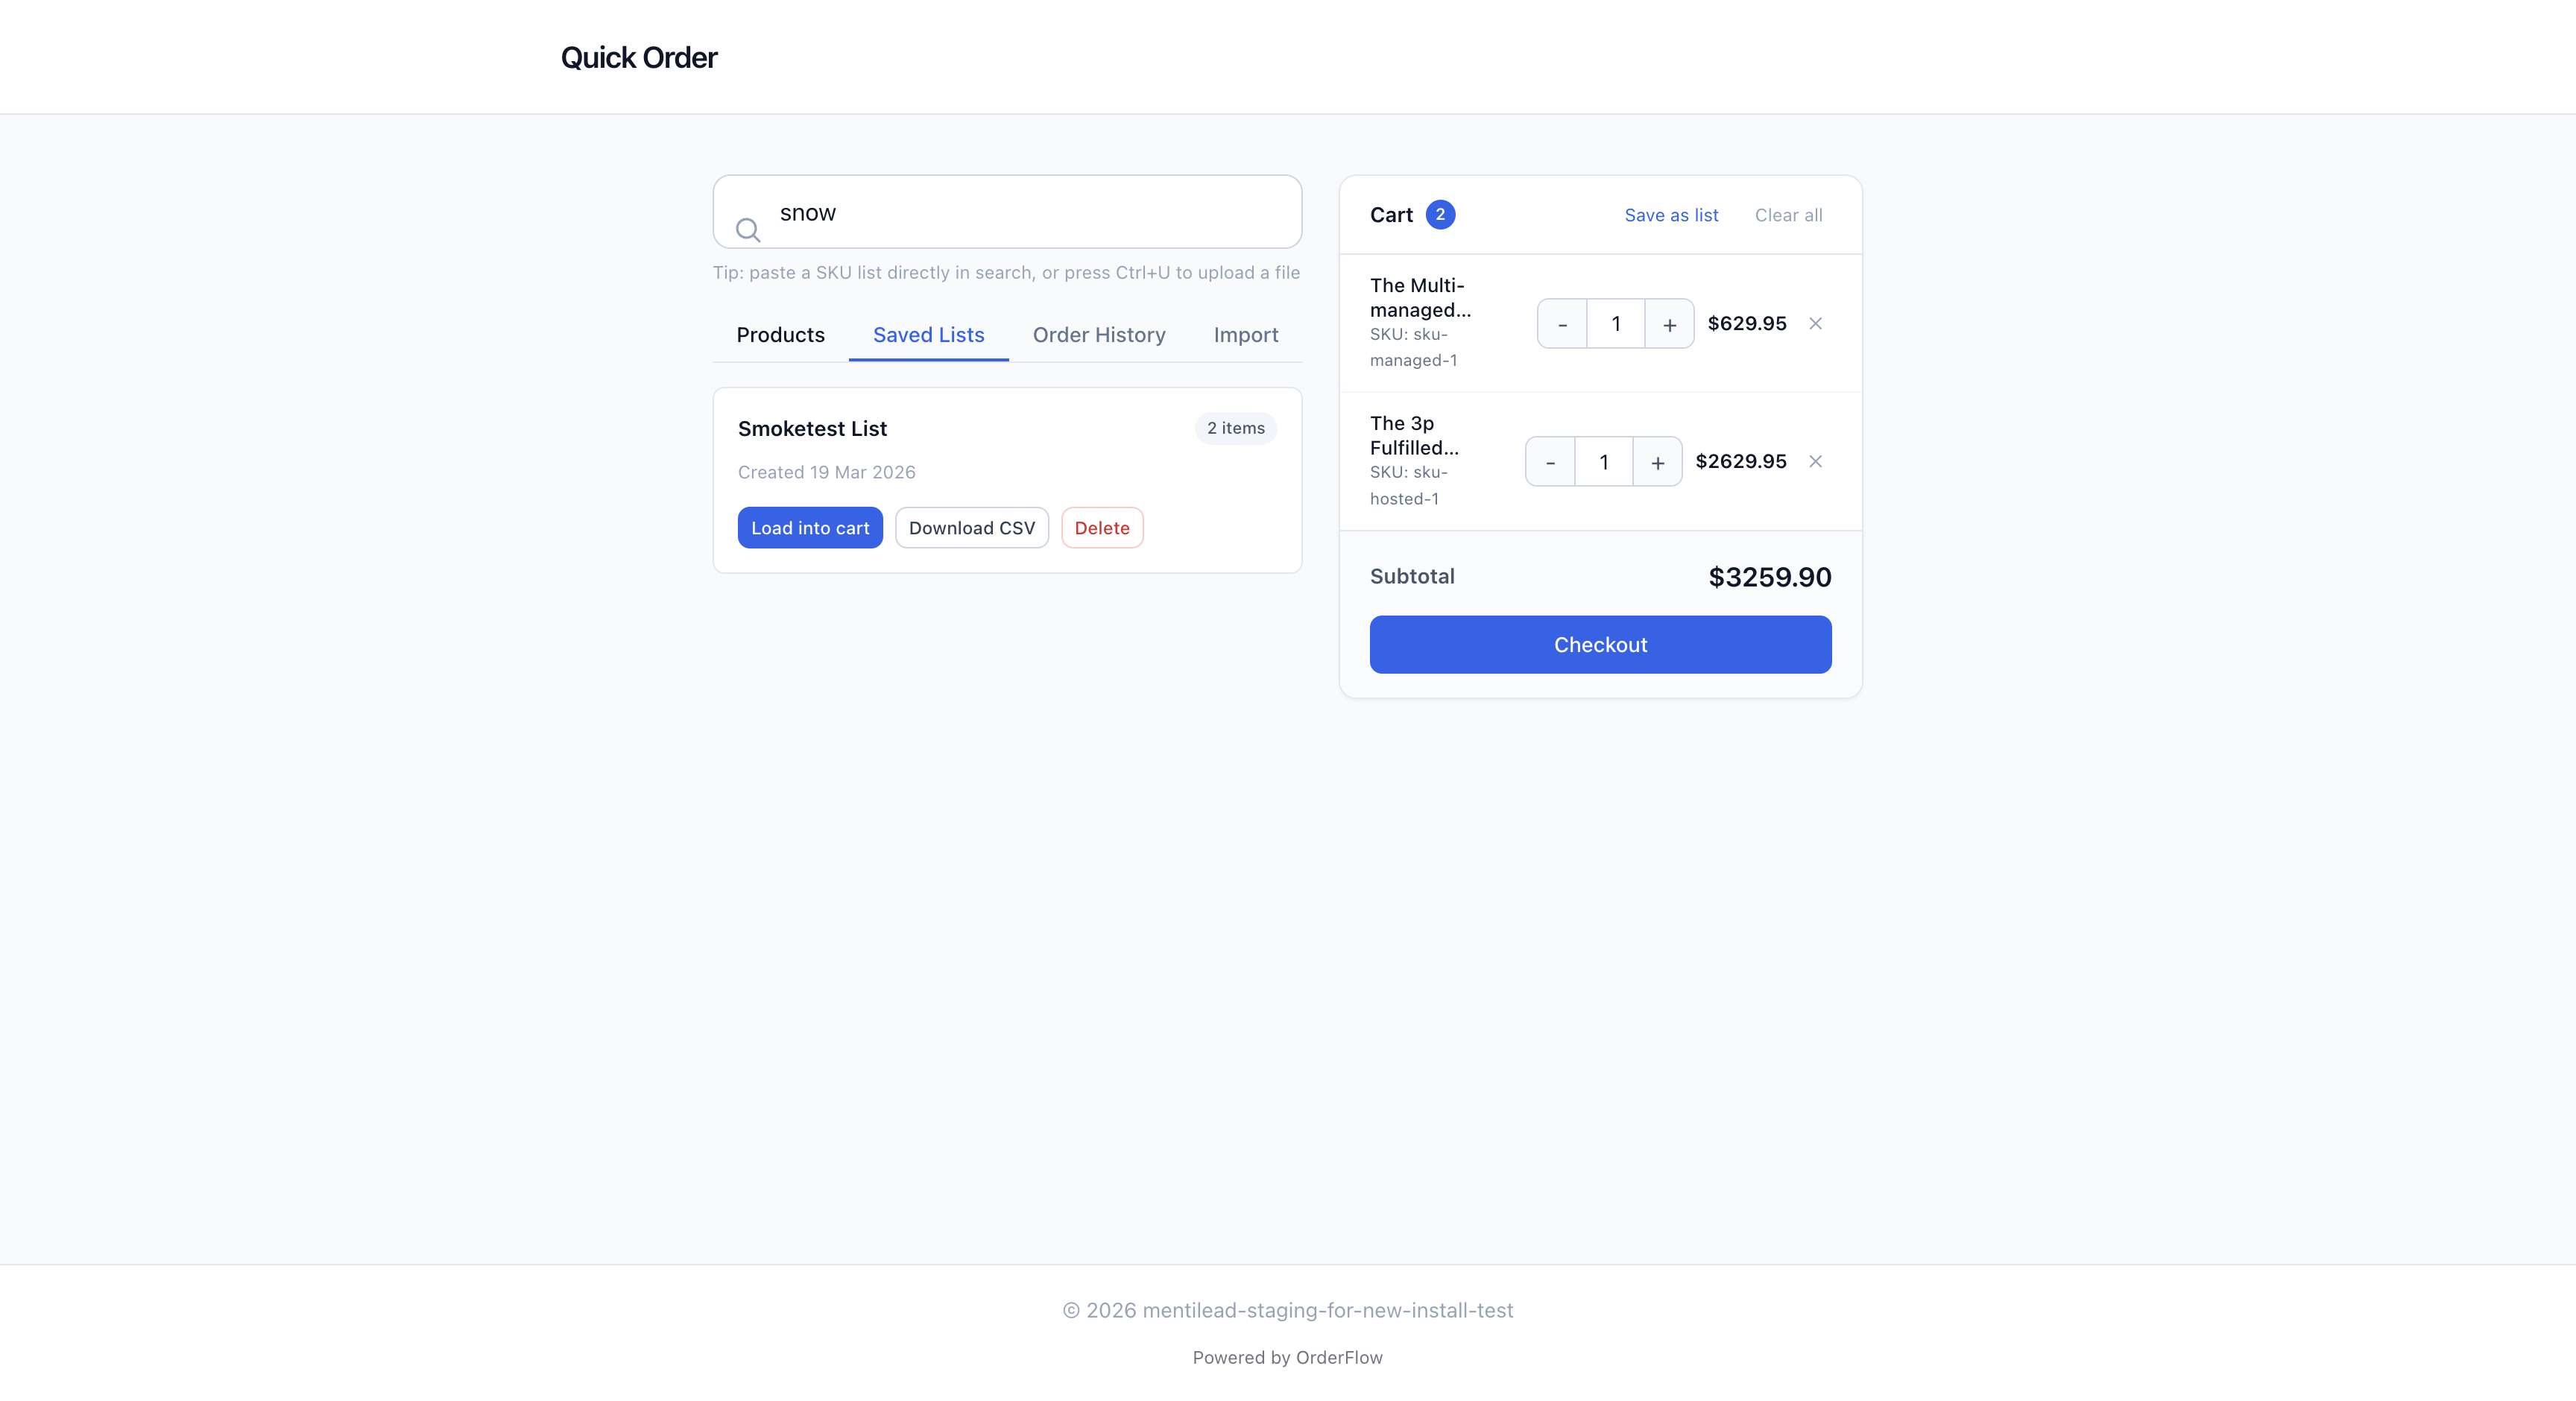
The Saved Lists tab shows all of a customer's saved lists in a clean card layout. Each card displays the list name, the number of items, and the date it was created. Three actions are available for each list: Load into cart (replaces the current cart contents with the saved list items), Download as CSV (exports the list as a spreadsheet for record-keeping or sharing), and Delete (permanently removes the saved list).
To save a new list, customers add items to their cart as usual, then click the "Save as list" button in the cart sidebar. A dialog asks for a list name — something descriptive like "Weekly Office Supplies" or "Monthly Kitchen Restock". The list is saved immediately and appears in the Saved Lists tab.
Customers can have multiple saved lists, and there is no limit on the number of items per list. Lists persist until the customer deletes them or the merchant uninstalls OrderFlow. This makes saved lists a reliable tool for building repeatable ordering workflows.
4. Order History
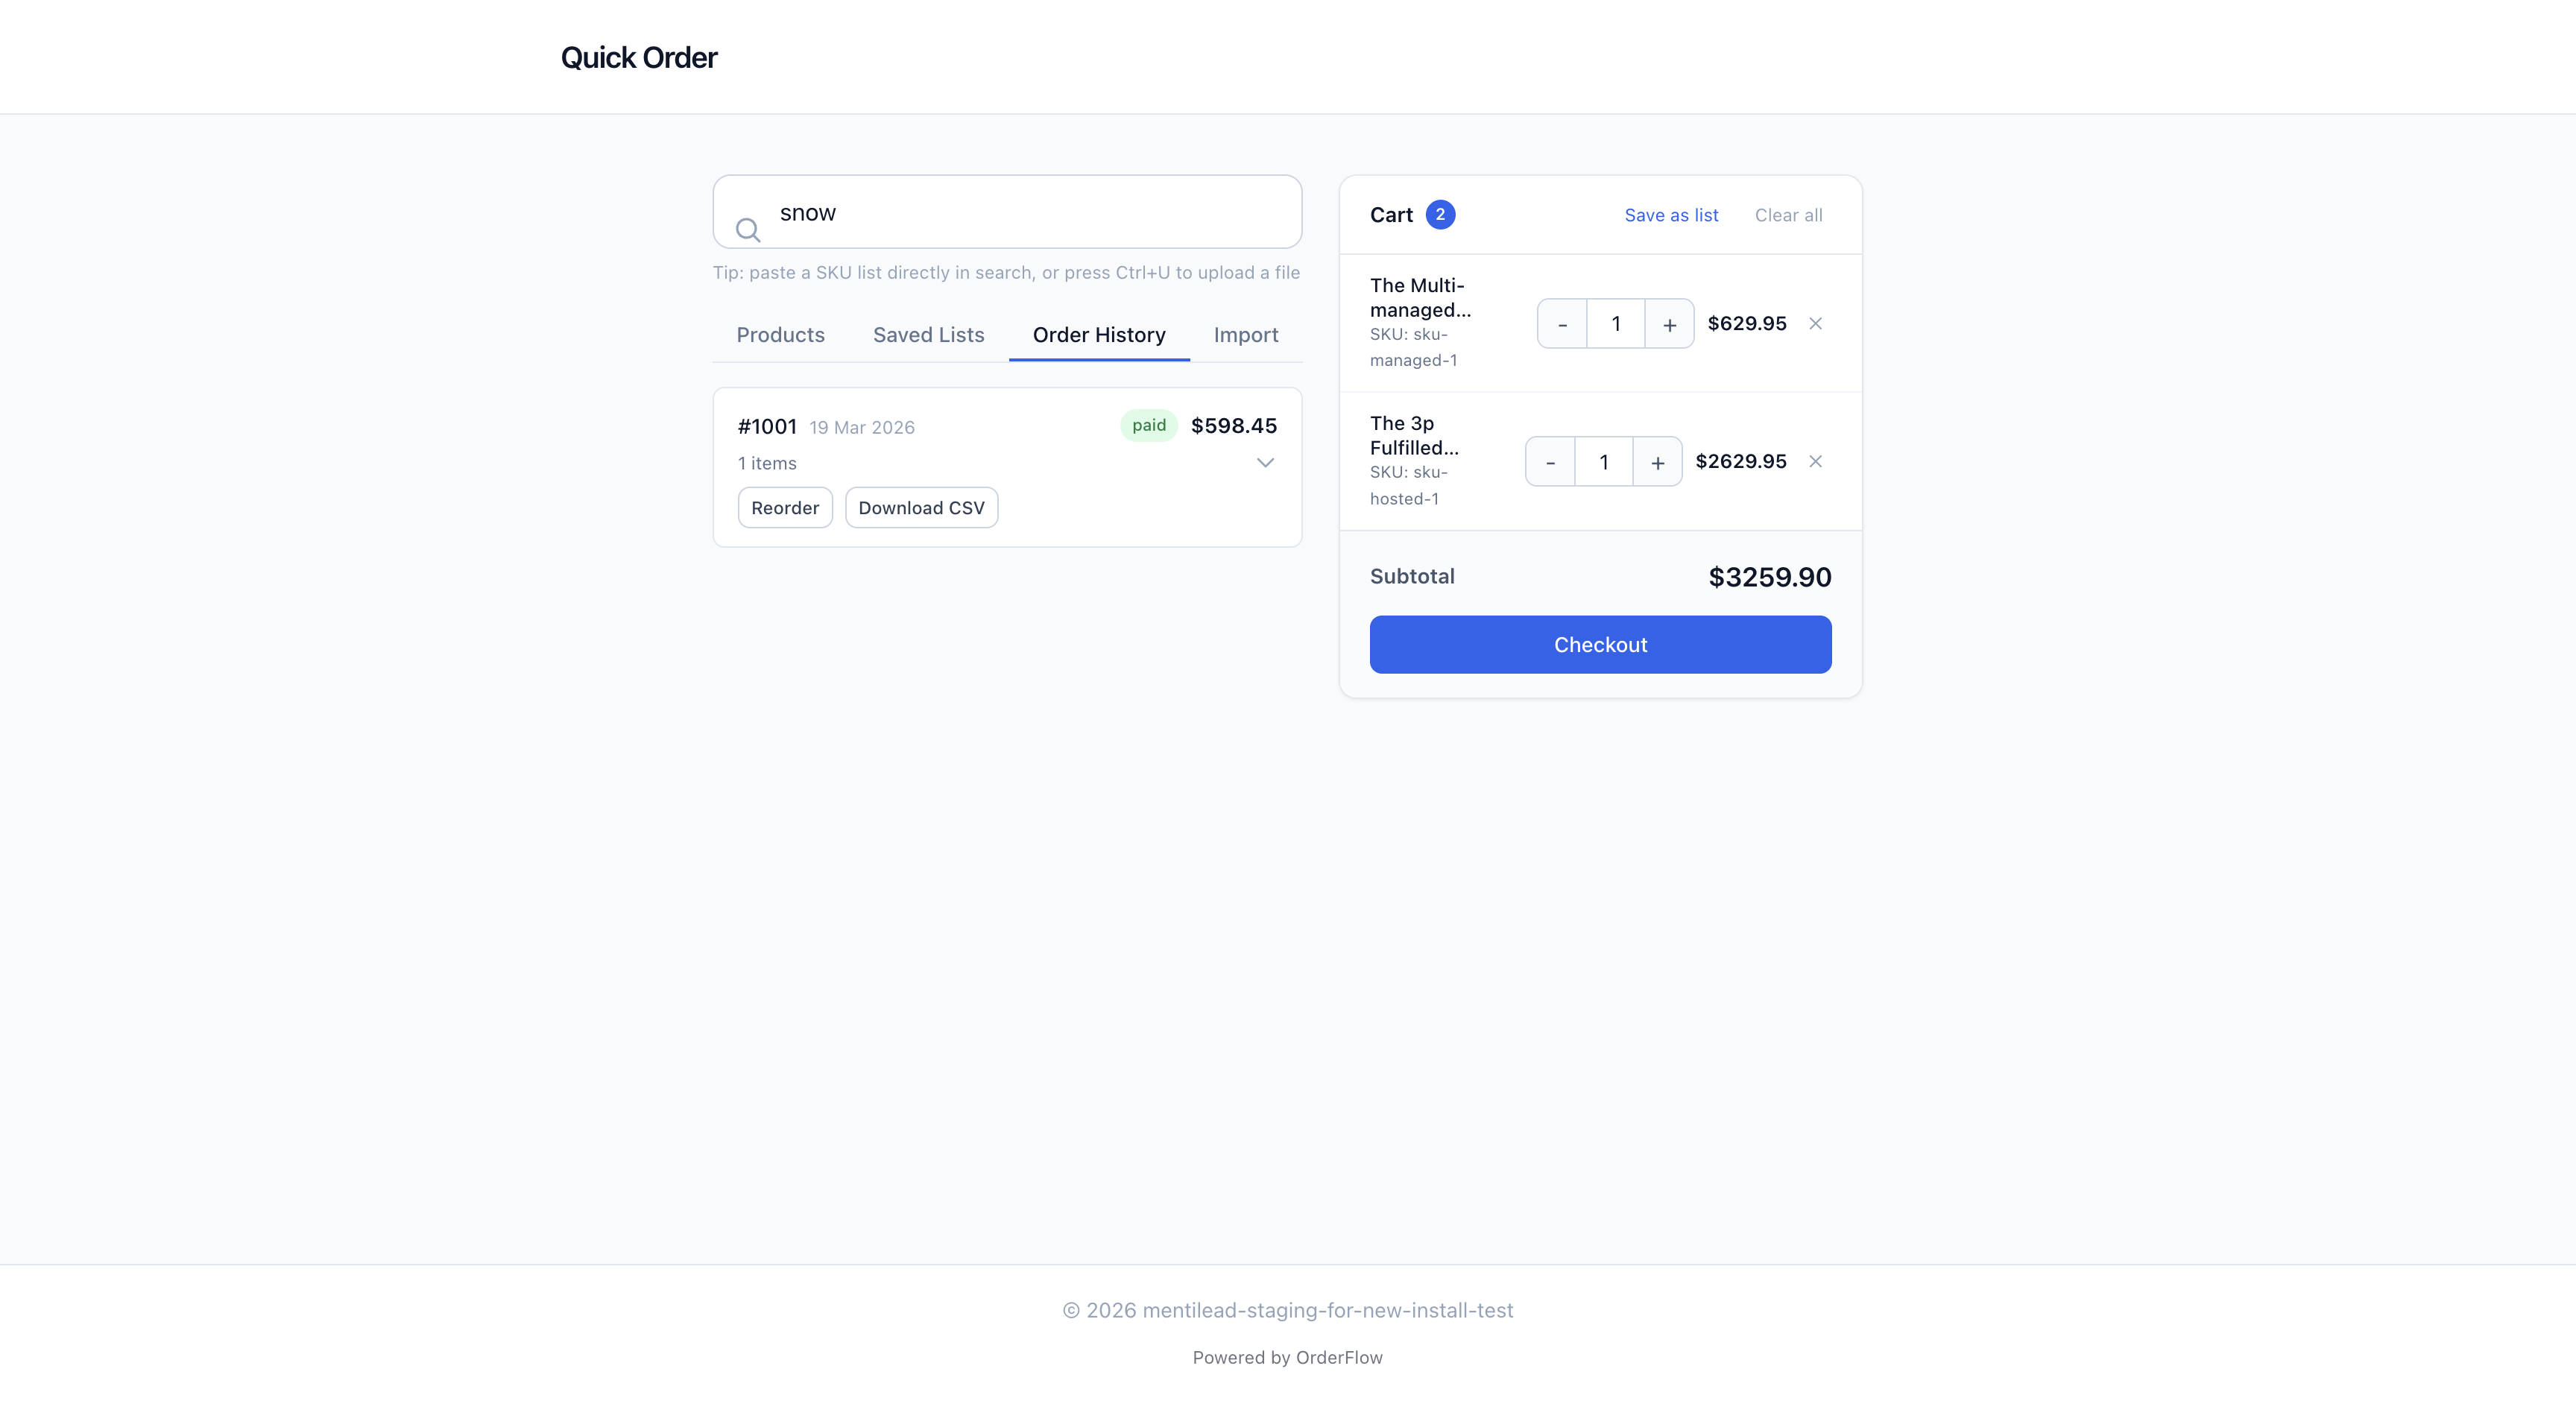
The Order History tab shows all previous orders placed through OrderFlow. Each order is displayed as a card with the order number, date, a color-coded status badge (Paid, Pending, or Refunded), and the order total. Orders are sorted newest first, so the most recent activity is always at the top.
Clicking on an order card expands it to show the full line-item details: product name, SKU, quantity ordered, and line price for each item. This gives customers a quick reference for what they ordered previously without needing to log into their Shopify account or search through email confirmations.
The "Buy again" button is the key feature here. When a customer clicks it, all items from that past order are loaded into the current cart with the same quantities. This is perfect for reordering — the customer can review the cart, adjust quantities if needed, and check out immediately. It turns a multi-step process into a two-click operation.
Order history is available on all plans, including Free. It shows only orders placed through OrderFlow (not orders from your regular Shopify storefront). This keeps the history focused and relevant to the B2B ordering workflow.
5. CSV/Excel Import
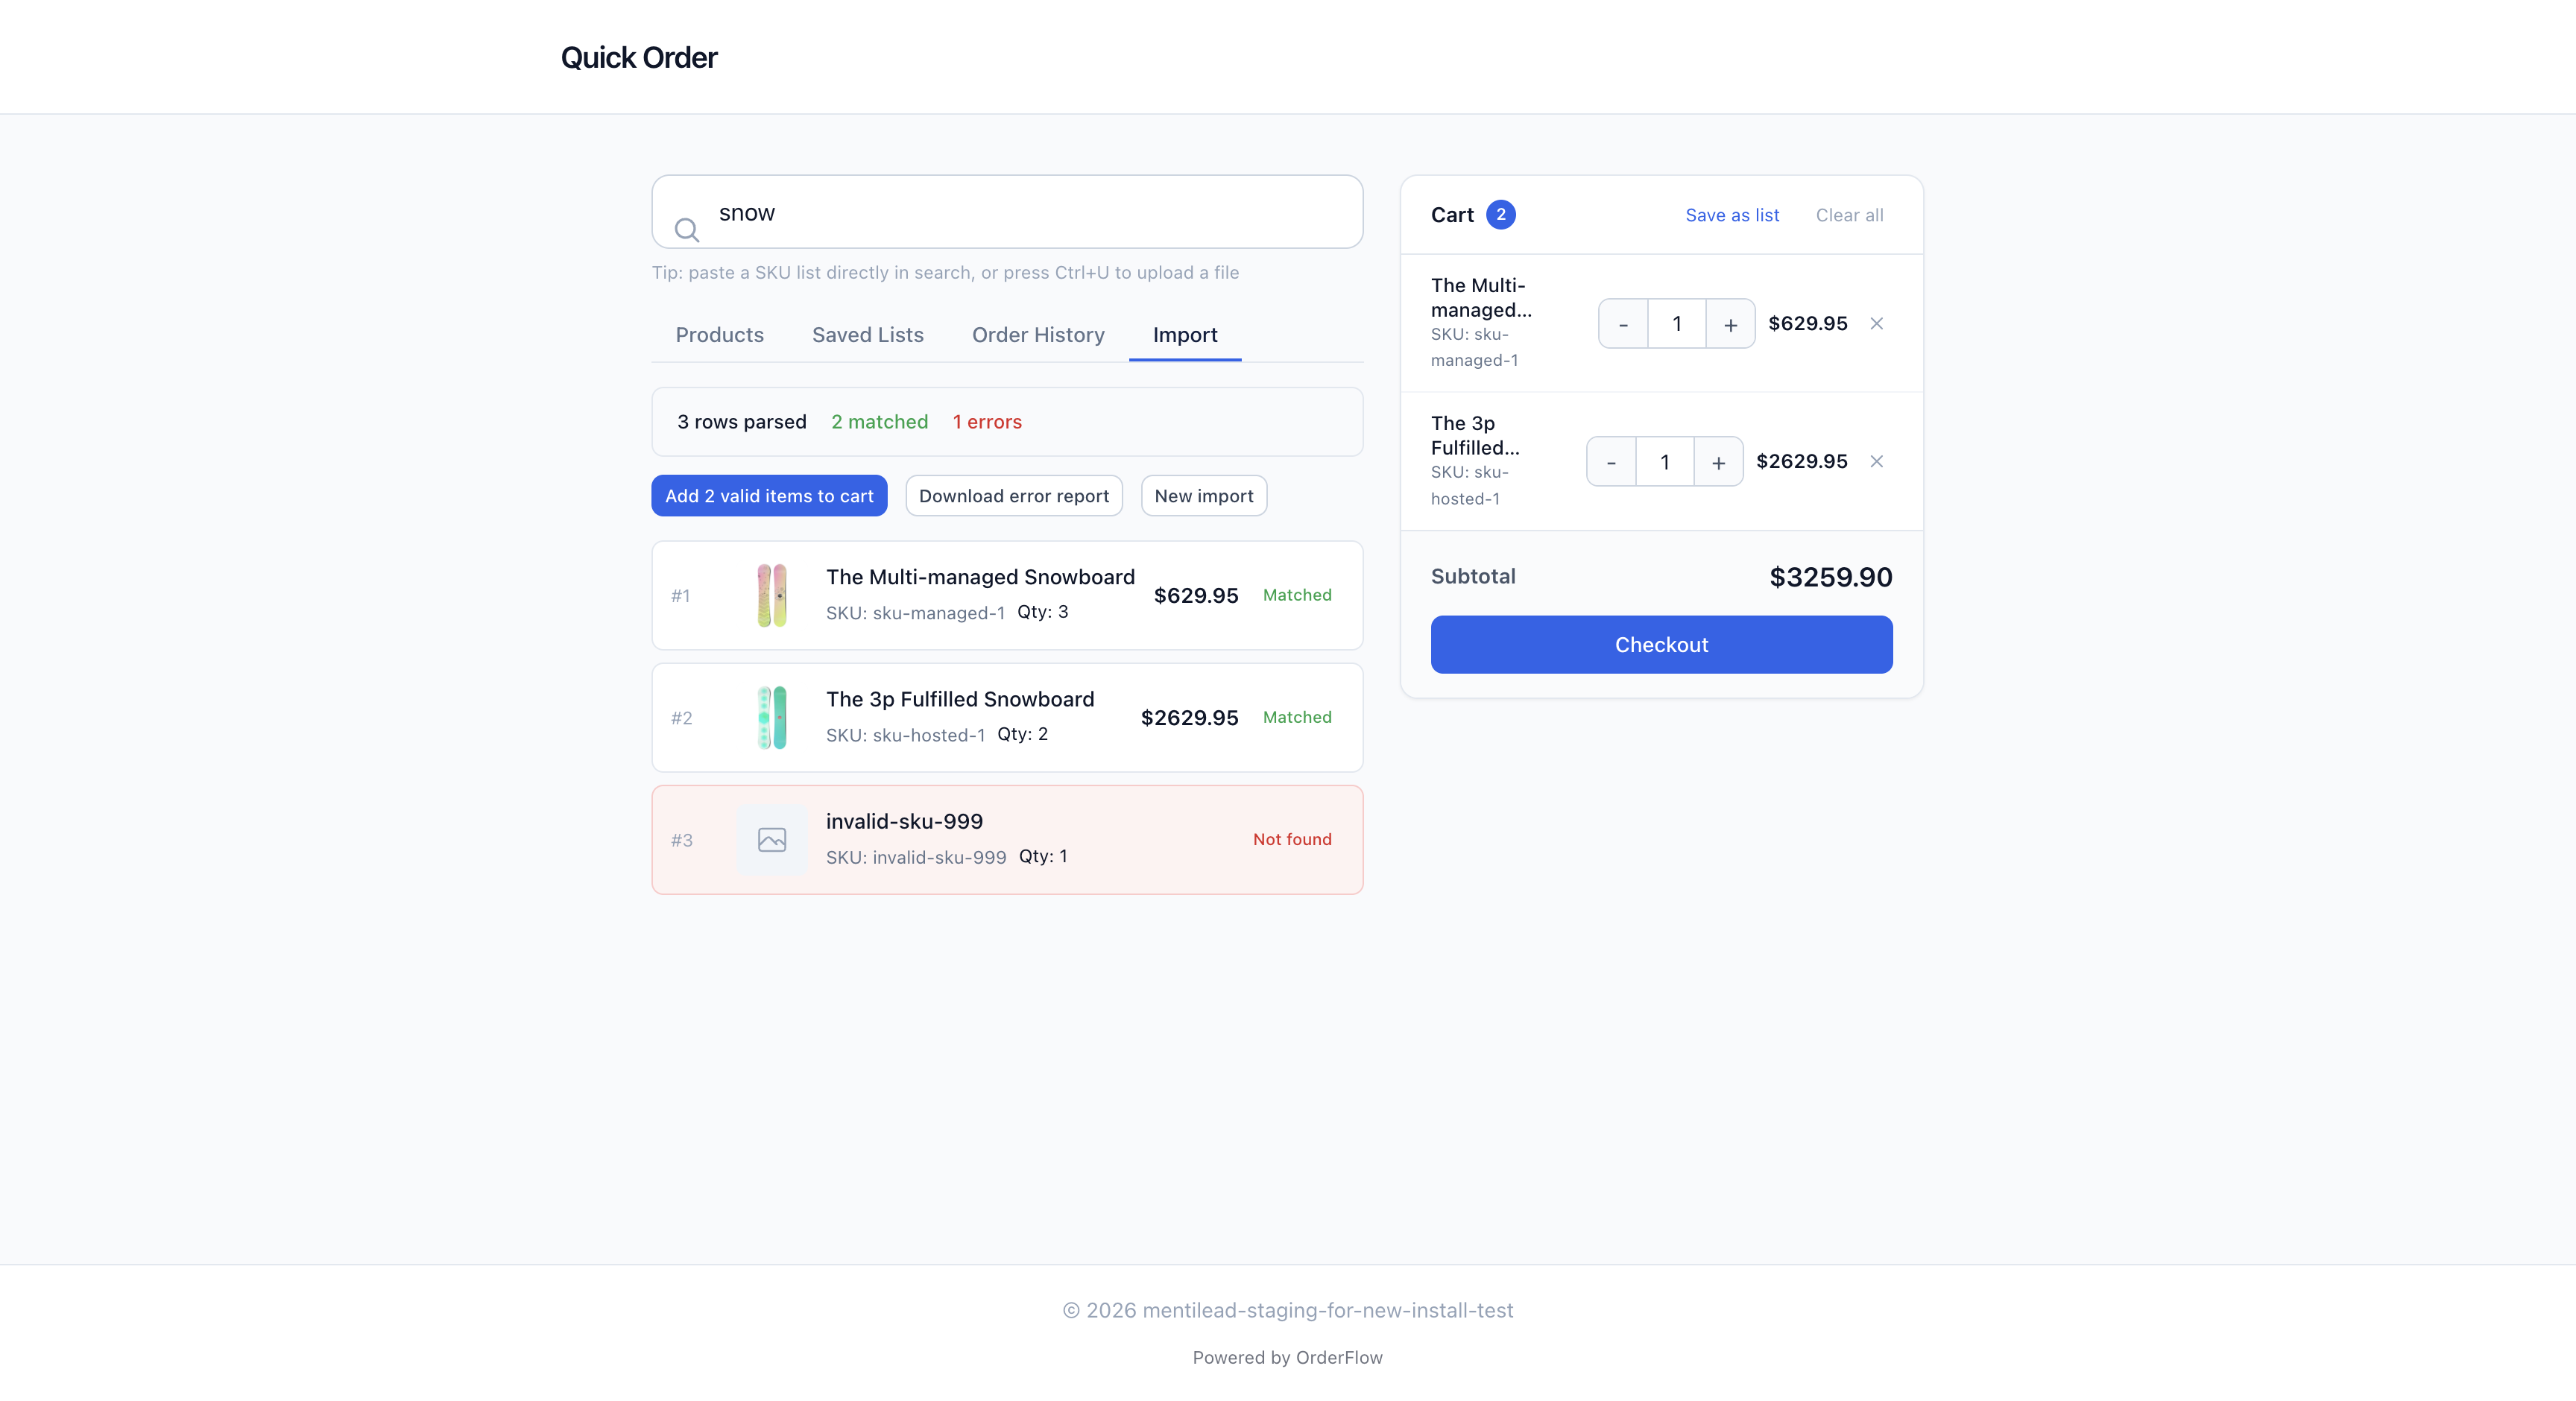
The Import tab accepts CSV, TSV, XLS, and XLSX files for bulk ordering. Customers can drag and drop a file onto the upload area or click to open a file picker. This is ideal for buyers who maintain their order lists in spreadsheets or receive purchase orders from their own systems.
After uploading a file, OrderFlow automatically detects and maps the columns. It looks for SKU and Quantity columns by analyzing the header row and column contents. If the automatic mapping is correct, results appear immediately. If auto-mapping fails or the columns have unusual names, a column mapping modal lets customers manually assign which column contains SKUs and which contains quantities.
The results screen shows three categories: Matched items (products found in your catalog, ready to add to cart), Unmatched items (SKUs that could not be found, with error details explaining why), and a Summary showing total rows processed, items matched, and items skipped. Customers click "Add all to cart" to add every matched item in one action.
On the Free plan, CSV import is limited to 50 rows per file. Standard and Plus plans have no row limit. There is also a paste detection feature: if a customer pastes multiple lines of text (such as copying a column of SKUs from a spreadsheet), OrderFlow detects the multi-line input and triggers the import flow directly, without needing a file upload.
6. Cart Management
On desktop, the cart sidebar is always visible on the right side of the page. It provides a real-time view of everything the customer has added. Each cart item shows: product title (clamped to two lines for long names), SKU, quantity stepper with plus and minus buttons, line price, and a remove button.
At the top of the cart sidebar, a badge shows the total item count, and two action buttons are available: "Save as list" (saves the current cart as a named list for future reuse) and "Clear all" (removes all items from the cart). At the bottom, the subtotal is displayed prominently along with the Checkout button.
When a customer clicks Checkout, OrderFlow creates a standard Shopify cart using the Storefront API and redirects the browser to Shopify's native checkout. This means the checkout experience is exactly what your customers already know — your payment methods, shipping options, discount codes, and checkout customizations all work as expected. OrderFlow never handles payment information directly.
On mobile, the cart sidebar is hidden to maximize screen space for browsing products. Instead, a bottom bar shows the current item count, running total, and a Checkout button. Tapping the bottom bar expands the full cart view as an overlay, where customers can review items, adjust quantities, and proceed to checkout.
7. Keyboard Shortcuts
OrderFlow includes keyboard shortcuts for power users who want to navigate the ordering process without reaching for the mouse. These shortcuts are designed for the most common actions during a typical ordering session.
| Shortcut | Action |
|---|---|
| / | Focus the search bar |
| Ctrl + U | Open file upload dialog |
| Escape | Clear current search |
On desktop, a small help panel in the corner of the search area shows available shortcuts as subtle hints. On mobile devices, keyboard shortcuts are hidden since they are not applicable to touch interactions. All shortcut keys are chosen to avoid conflicts with common browser shortcuts.
8. Mobile Experience
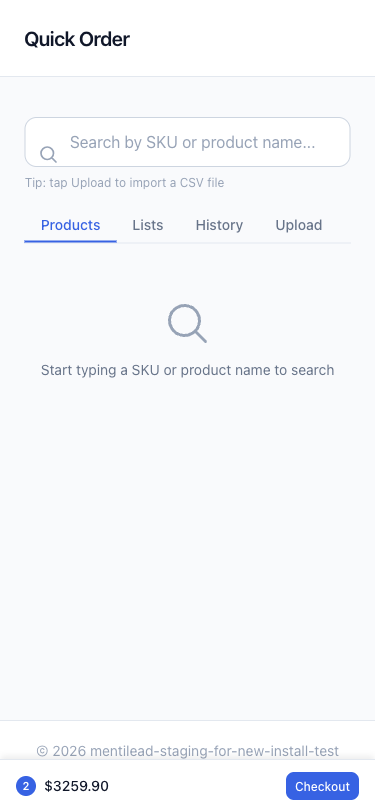
At mobile widths (375px and below), the quick order page adapts its layout for comfortable touch-based ordering. The core functionality remains identical — customers can search, browse, add to cart, and check out — but the visual layout changes to fit smaller screens.
Product cards stack vertically in a single column. The Add button moves below the product info instead of sitting inline, giving it a larger touch target. The variant selector and quantity stepper are full-width for easier interaction. A barcode scanning button appears in the search bar for quick warehouse-style ordering.
The cart becomes a bottom summary bar showing the item count, running total, and a Checkout button. Tapping "View Cart" slides up a bottom sheet with the full cart contents, line-item editing, and checkout. This replaces the desktop sidebar and keeps the cart accessible without leaving the product list.
Keyboard shortcut hints are hidden on mobile since they do not apply to touch interfaces. All interactive elements meet minimum touch target sizes (44x44 points) for reliable tapping. The search bar is prominently placed at the top of the viewport and the file upload area is sized for easy drag-and-drop on tablets.
9. Minimum Order Quantities
Standard + Plus plans
When your merchant has configured minimum order quantities (MOQ), products on the quick order page display MOQ badges showing the required minimum and step increment — for example, "Min: 5 · Step: 5". These badges appear directly on the product card so buyers know the ordering constraints before they start adding items.
Quantity steppers enforce MOQ rules automatically. The stepper starts at the configured minimum instead of 1, and each press of the plus or minus button increments by the step value rather than by 1. If a buyer manually types a quantity that does not meet the minimum or align with the step increment, an inline error message appears explaining the requirement — the item cannot be added to the cart until the quantity is corrected.
MOQ validation also applies to CSV imports and saved list loads. When a CSV file contains a quantity below the product's minimum, the row is flagged as an error in the import results with a clear message indicating the required minimum. When a saved list is loaded into the cart, any quantities that no longer meet current MOQ rules are automatically adjusted upward to the nearest valid value, and a notice informs the buyer which items were adjusted.
MOQ rules follow a precedence hierarchy: per-product overrides take priority over per-collection rules, which take priority over the global default. This means merchants can set a baseline minimum for the entire catalog, raise it for specific collections (e.g. bulk-only categories), and fine-tune individual products as needed. The Standard plan includes global and per-product MOQ; the Plus plan adds per-collection rules.
10. B2B Features
Standard + Plus plans
B2B features are available on Standard and Plus plans. The quick order page adapts automatically based on the buyer's B2B context — no configuration is needed beyond setting up Shopify Markets or B2B companies in your Shopify admin.
On the Standard plan (and any store using Shopify Markets with catalog price lists), OrderFlow detects market-based B2B. A banner at the top of the page shows "Ordering as [catalog title]". Products display catalog-adjusted prices in a distinct blue color with the retail price shown as a crossed-out reference. This makes it immediately clear that the buyer is seeing their wholesale rates. No payment terms or draft order approval applies on the market path.
On the Plus plan, OrderFlow additionally detects Shopify B2B companies. The banner shows the company name and location, confirming the buyer is ordering on behalf of their organization. If the company has payment terms configured (e.g., Net 30), a payment terms badge appears near the cart subtotal. The checkout flow respects these terms automatically through Shopify's native B2B checkout.
For companies with approval workflows, orders above a configured threshold create draft orders instead of proceeding directly to checkout. The buyer sees a confirmation that their order has been submitted for approval, and the merchant receives a notification in the Shopify admin to review and approve the draft order. This prevents unauthorized large purchases while still giving buyers a smooth ordering experience.
11. Access Control
The quick order page handles several access states gracefully, showing clear messages to customers when they cannot place orders. Each state is designed to explain what is happening and guide the customer toward the appropriate next step.
Page disabled
The merchant has turned off the quick order page in Settings. Customers see a message explaining that the page is currently unavailable. This is useful for temporarily pausing orders during inventory counts or system maintenance.
Login required
The page requires a logged-in Shopify customer account. Visitors who are not logged in see a message with a link to the store's login page. After logging in, they are redirected back to the quick order page automatically.
Not eligible
The logged-in customer does not have the required customer tag or B2B company membership configured in the Buyer Eligibility settings. The message explains that their account does not have access and suggests contacting the store for assistance.
Order limit reached
The Free plan's limit of 10 orders placed through OrderFlow per month has been reached. Customers see a message explaining that the monthly limit is exceeded and that orders will be available again at the start of the next billing cycle. Merchants see a prompt to upgrade in their admin dashboard.
All access control messages are styled consistently with the page's branding and use clear, non-technical language. The goal is to prevent confusion — customers should always understand why they cannot order and what they can do about it.