Branding Guide
Make the quick order page match your store's look and feel.
Overview
The Branding page in your OrderFlow admin lets you customize the quick order page's appearance without writing a single line of code. Whether your store has a bold, high-energy aesthetic or a clean, minimal design, you can tailor the order page so it feels like a native part of your storefront rather than a third-party add-on.
Start by selecting one of six built-in presets that set a coordinated baseline for colors, fonts, and shape. From there, fine-tune individual design tokens to dial in the exact look you want. Every change previews in real time right inside the admin, so you can see the result before saving.
All branding settings are applied exclusively to the storefront proxy page — the public-facing quick order page your customers see at yourstore.com/apps/orderflow. They do not affect your Shopify admin interface, your theme, or any other part of your store. This means you can experiment freely without worrying about unintended side effects.
Branding is available on all plans, including the Free plan. When you change anything, Shopify's save bar appears at the top of the admin. Click Save to publish your changes, or Discard to go back to the saved version. While there are unsaved changes, the admin keeps you on the page until you save or discard. Saved changes take effect the next time a customer loads the order page.
When the order page is turned off or not yet available, the "not currently available" page your customers see also uses your branding.
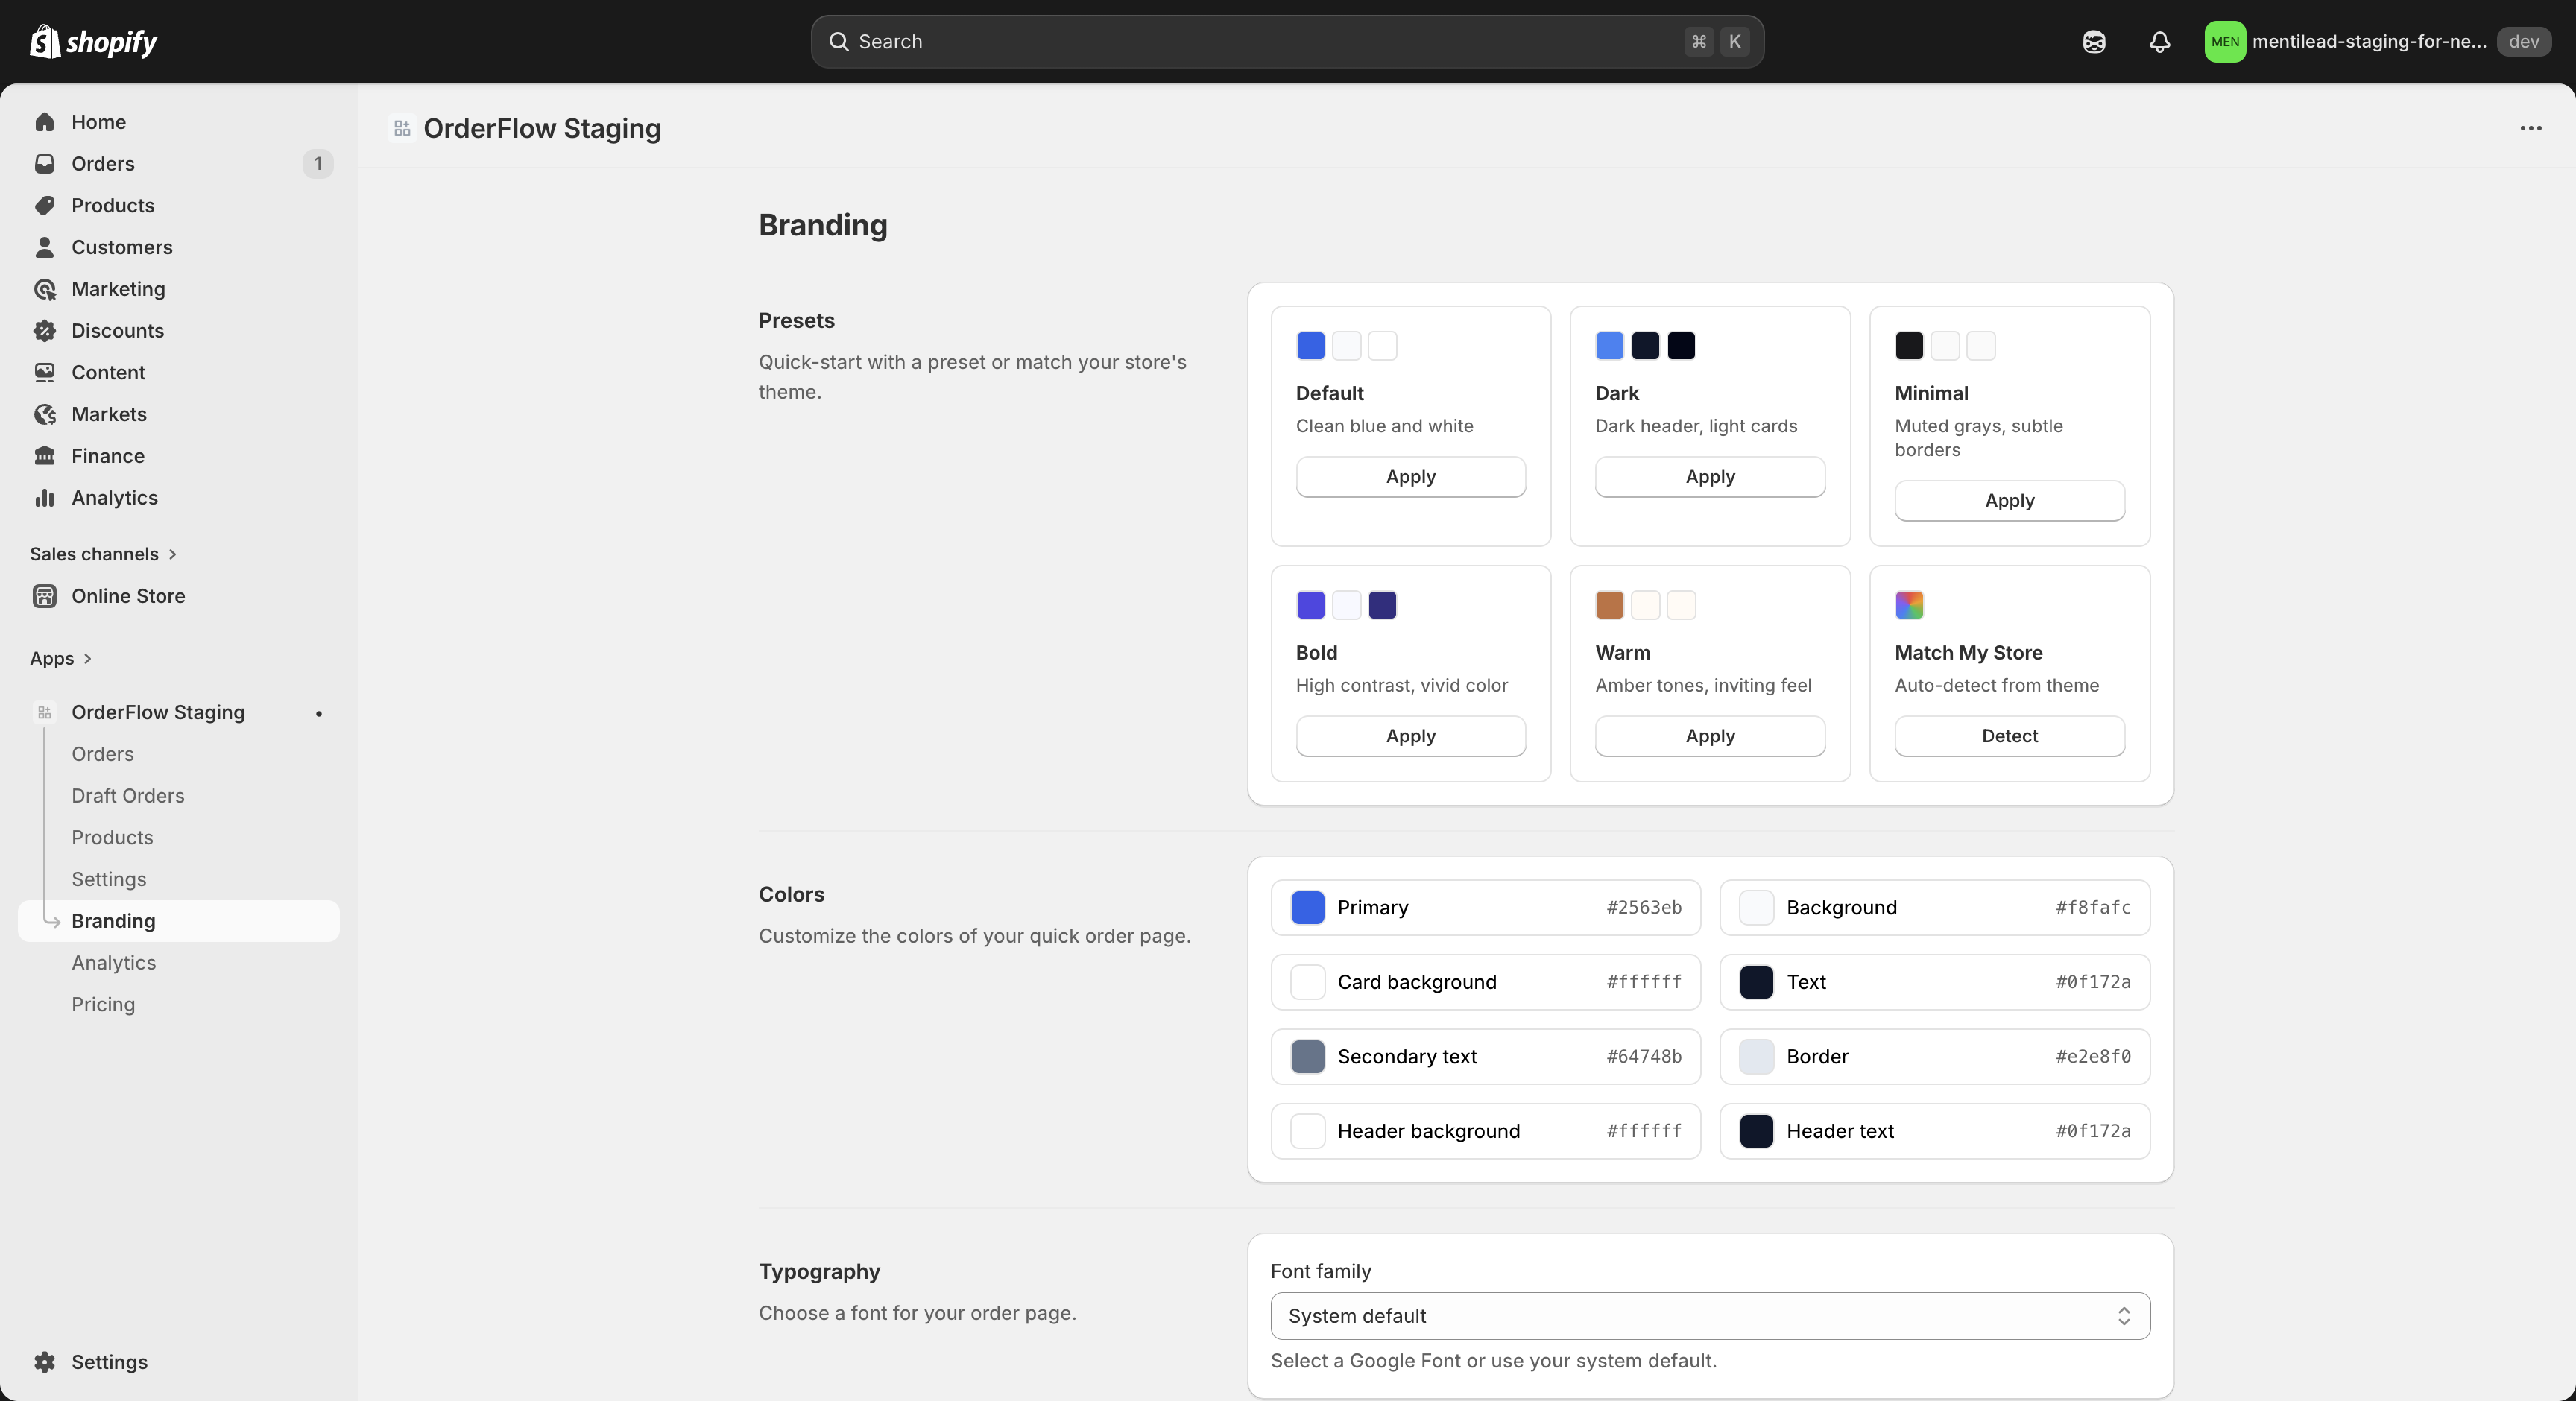
Presets
OrderFlow ships with six carefully designed presets, each setting the eight core color tokens, the font family, and the border radius to a coordinated combination. Your Error and Success colors are kept when you apply a preset. Presets are the fastest way to get a polished look — pick one that's close to your brand, then adjust individual tokens as needed.
The six presets are:
- Default — A clean light theme with blue accents. This is the starting point for most stores and works well out of the box with a professional, neutral feel.
- Dark — A dark background with light text and a modern feel. Ideal for stores with a premium, tech-forward, or night-mode aesthetic.
- Minimal — Reduced visual weight with subtle borders and no shadows. Best for stores that prioritize simplicity and whitespace.
- Bold — High contrast with strong colors and prominent buttons. Great for stores that want the order page to feel energetic and action-oriented.
- Warm — Warm beige and brown tones designed for artisan, organic, or natural product brands. Feels inviting and earthy.
- Match My Store — Attempts to inherit colors from your active Shopify theme automatically. This uses the theme's primary and secondary colors as a starting point, giving you a head start on brand alignment. The detected colors fill in the form; review them and click Save in the save bar to apply them.
After selecting a preset, every token is unlocked for individual customization. The preset simply sets the starting values — it does not lock you in. If you change a single token and later select a different preset, all tokens will reset to that preset's values, so save your custom work before switching.
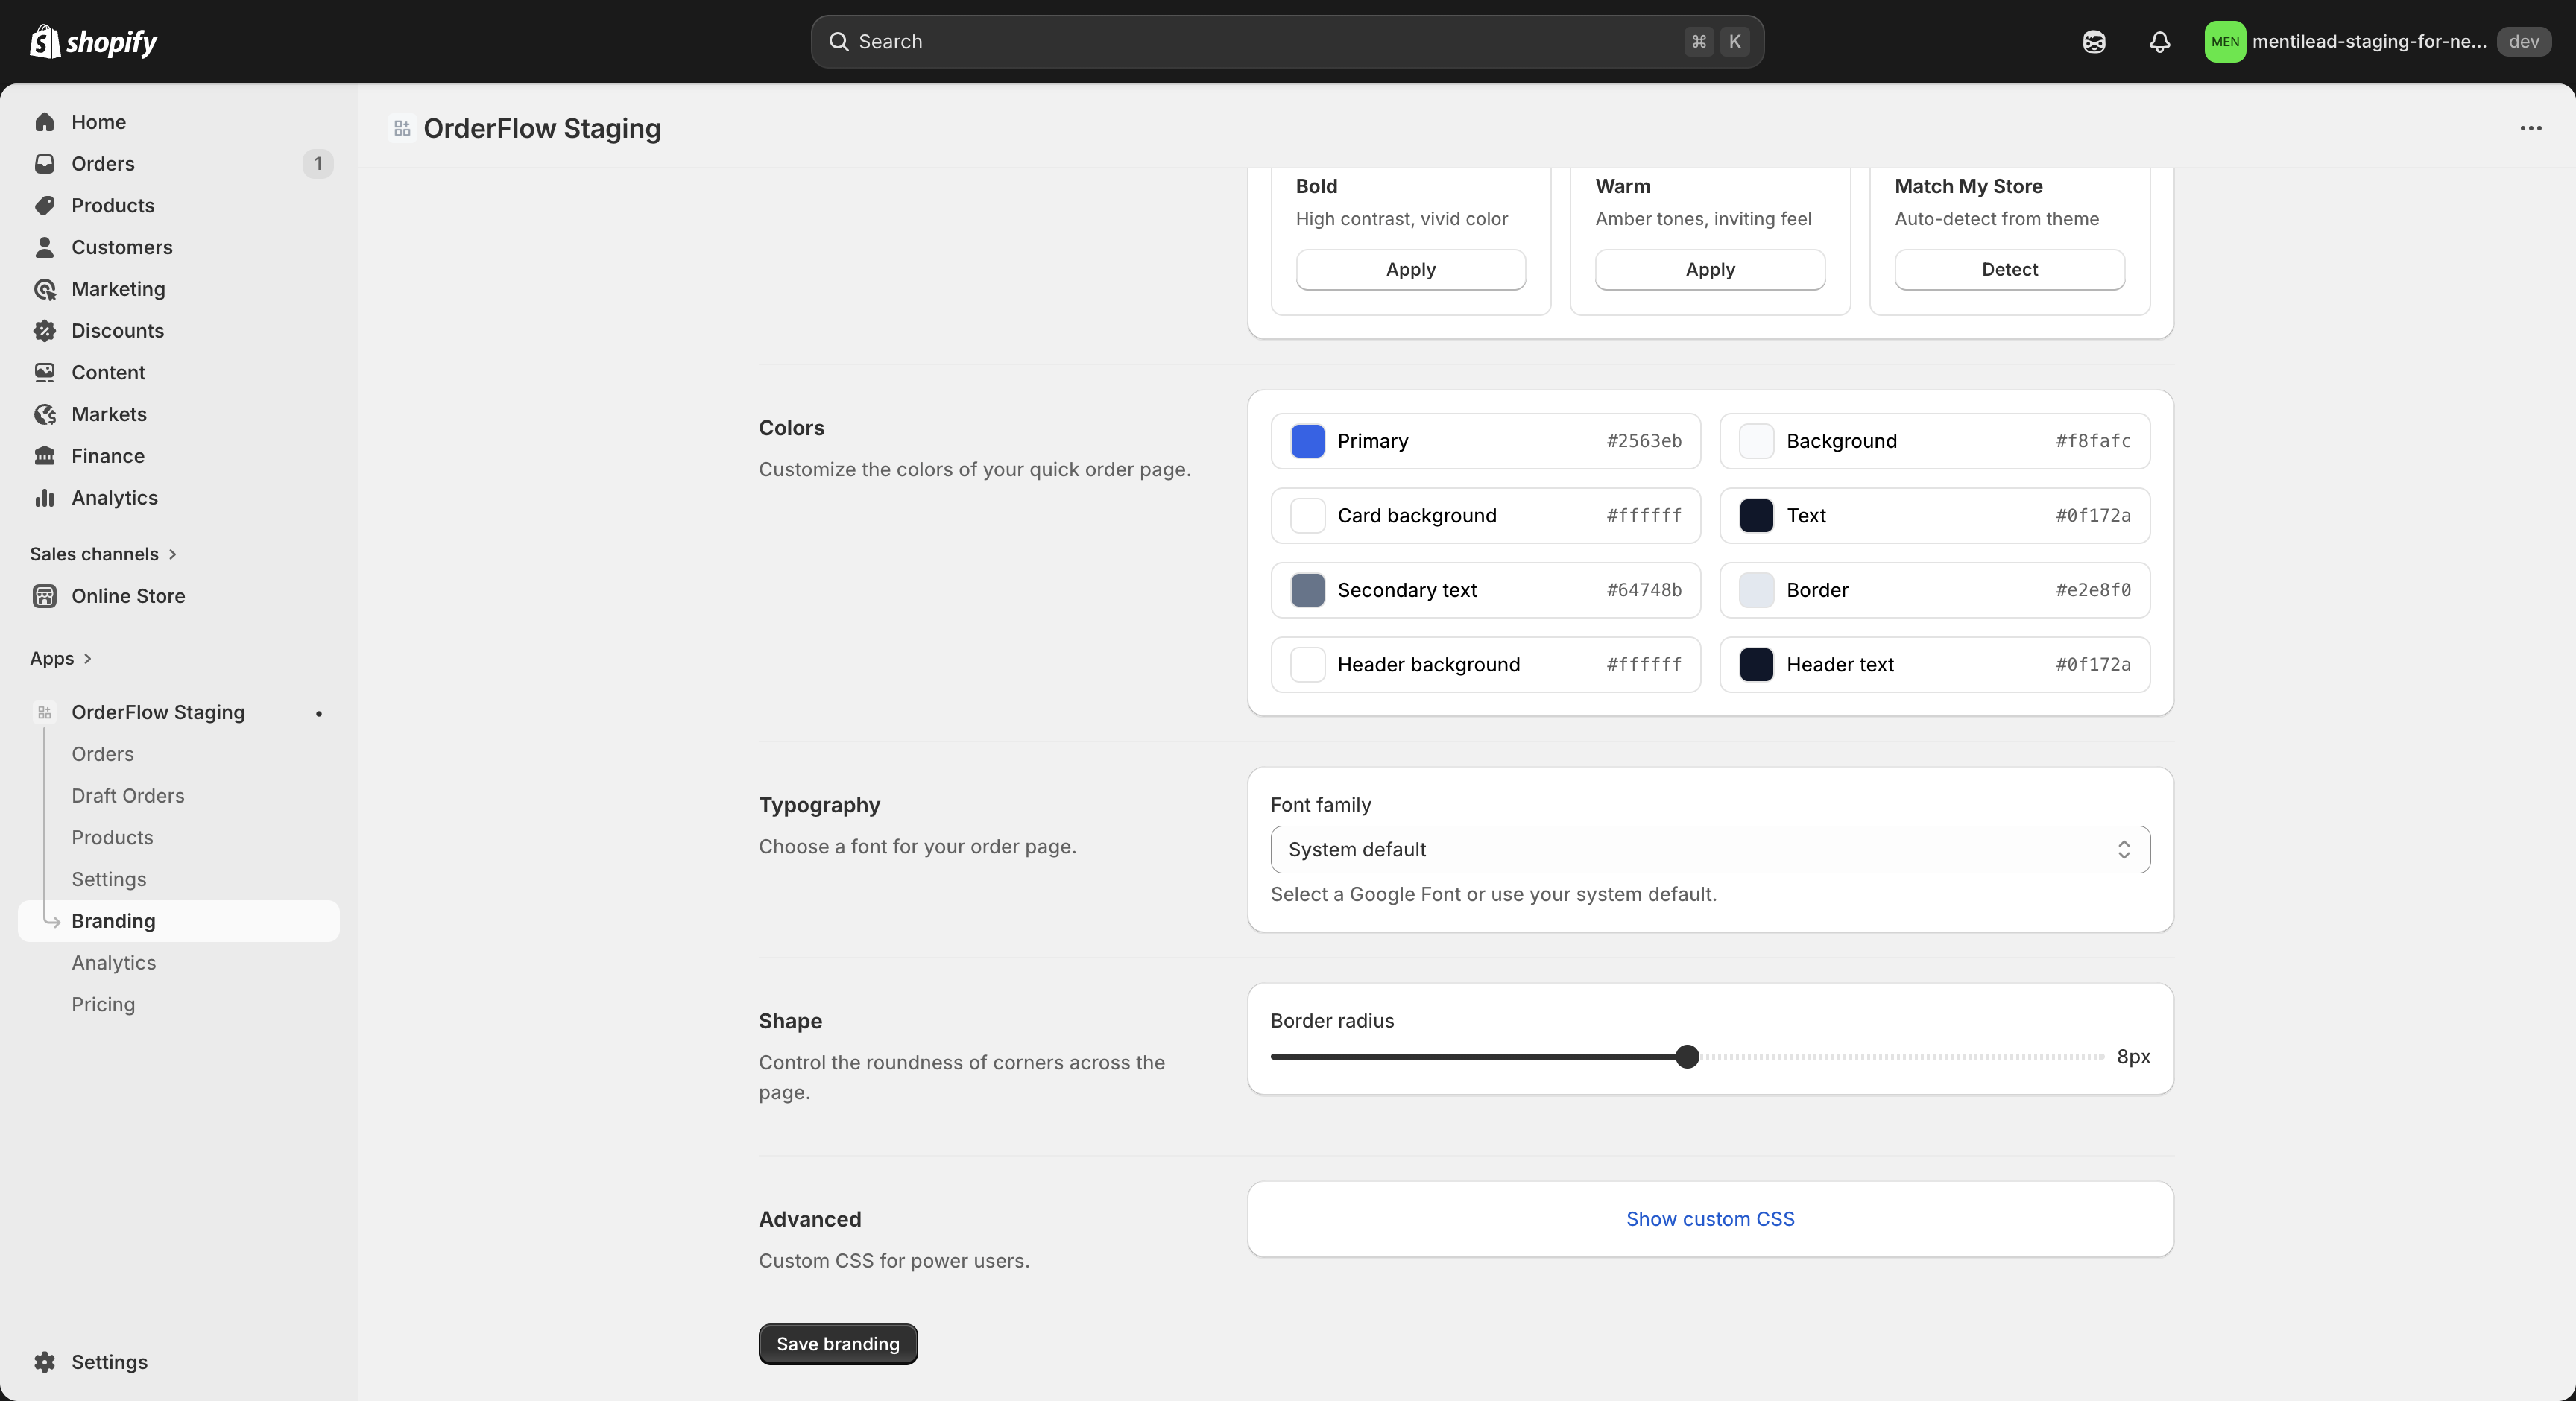
Color Tokens
OrderFlow uses ten color tokens to control the appearance of the quick order page. Each token maps to a specific role in the UI, so changing one value updates every element that uses it. This token-based approach ensures visual consistency across buttons, cards, headers, text, and borders.
The ten tokens are:
- Primary — The main accent color used for buttons, links, and active states. This is the most visible brand color on the page.
- Background — The page background color. Sets the overall canvas for the entire order page.
- Card Background — The background color for cards and panels, including the product list, cart summary, and search area.
- Text — The primary text color used for headings, product names, prices, and body content.
- Secondary Text — A muted text color for less prominent information such as SKUs, helper text, and secondary labels.
- Border — The color for borders, dividers, and input outlines. Subtle but important for visual structure.
- Header Background — The background of the top header bar on the order page.
- Header Text — The text and icon color in the header bar.
- Error — Error messages, invalid-SKU and CSV row errors, and remove or "danger" buttons. The message background and border are tinted automatically from this color and your Card Background, and on dark cards the text is lightened so it stays readable.
- Success — Success messages, "in stock" and complete badges, and the completed progress bar.
Warning panels (stock warnings, the VAT banner, draft-order notices) and info banners (B2B pricing, the welcome message) have no color of their own — they are tinted from your Card Background and Primary colors, so dark presets get dark panels automatically. Match My Store also picks up your theme's error color when the theme publishes one (most free themes, such as Dawn, do not).
Each token has a color picker and a hex input field, so you can either click to choose visually or paste an exact hex value from your brand guidelines. The preview updates instantly as you adjust values.
Tip: Start with a preset that's close to your brand, then adjust just the Primary and Background tokens to match your store's palette. In most cases, tweaking two or three tokens is enough to achieve a strong brand match.
Contrast Check
Under the color controls, the Colors card shows a live contrast badge for the four color pairs your customers actually read on the order page. The badges update as you pick colors, apply a preset, or detect your theme's colors:
- Text on page background — the Text color on the Background color.
- Secondary text on cards — the Secondary Text color on the Card Background color.
- Header text on header background — the Header Text color on the Header Background color.
- Button text on primary colour — white button text on the Primary color.
Each badge shows the contrast ratio and a verdict based on the WCAG 2.1 AA guidelines:
- Green "AA pass" — 4.5:1 or more. Readable at any text size.
- Amber "Large text only" — between 3:1 and 4.5:1. Fine for large headings, but hard to read for normal body text.
- Red "Low contrast" — under 3:1. Many customers will struggle to read this combination.
Buttons on the order page always use white text, so choose a Primary color that is dark enough for white text to stand out. Light or pastel primary colors usually show an amber or red badge on the button row.
The check is advisory only: it never blocks saving. You can save any combination, for example when you need to match an exact brand color.
Every built-in preset passes AA on all four pairs. The Dark, Warm, and Bold presets were adjusted slightly in September 2026 to get there (a deeper primary color on Dark and Warm, darker secondary text on Bold). Stores that already applied one of these presets keep their saved colors until they apply the preset again.
Typography
The Typography setting lets you select a font family from a curated list of popular Google Fonts. The dropdown includes Inter, Roboto, Open Sans, Lato, Poppins, Nunito, Source Sans Pro, and several other widely used typefaces that render well at all sizes and on all devices.
When you select a font, OrderFlow loads it from Google Fonts on the proxy page using an optimized <link> tag with font-display: swap to prevent invisible text while the font loads. System fonts (such as the device's default sans-serif) are always included as a fallback, so the page remains readable even if the Google Fonts CDN is temporarily unavailable.
The selected font applies to all text on the quick order page — headings, product names, prices, buttons, inputs, and helper text. This gives the page a cohesive typographic identity. If your Shopify theme uses a specific Google Font, choosing the same font in OrderFlow creates seamless visual continuity between your store and the order page.
If you are unsure which font to choose, Inter (the default) is an excellent all-purpose typeface designed specifically for user interfaces. It has clear letterforms, consistent spacing, and strong readability at small sizes — all qualities that matter for a data-dense order page.
On the Plus plan you can also use your own brand font: fonts you add under Fonts and Fine-Tuning (below) appear in a "Your fonts" group at the top of the Font family list.
Shape (Border Radius)
The Shape control is a single slider that sets the border radius for all rounded elements on the order page — cards, buttons, input fields, badges, and dropdown menus. It ranges from 0px to 16px and updates the preview in real time as you drag.
At 0px, every element has sharp, square corners. This creates a modern, architectural feel that works well with minimal or editorial design styles. At 8px (the default), elements have softly rounded corners that feel friendly and approachable without being playful. At 16px, corners are fully rounded, giving the page a softer, more casual appearance.
Because the slider controls a single design token that cascades to all UI elements, you get visual consistency with one adjustment. There is no need to round buttons and cards separately — the single value applies everywhere. This is intentional: a consistent border radius is one of the simplest ways to make a page feel polished and designed.
If your Shopify theme uses sharp corners, set this to 0px. If your theme has large, pill-shaped buttons, push it closer to 16px. Matching the border radius to your theme's existing shape language helps the order page feel integrated rather than bolted on.
Fonts and Fine-Tuning
The Fonts and fine-tuning section is available on the Plus plan. On other plans it shows an upgrade card instead. It lets you use your own brand fonts and fine-tune the label style, input borders, and button style of the order page.
Your fonts. If your brand font is not on Google Fonts, upload the font file yourself in your Shopify admin under Content → Files. Copy the file's URL, which starts with https://cdn.shopify.com/s/files/. In OrderFlow, enter a font name (for example "Brand Sans"), paste the URL, pick the weight and style of that file, and click Add font. The font then appears in a "Your fonts" group at the top of the Font family list in Typography. Select it there and save.
- Supported formats: WOFF2, WOFF, TTF, and OTF. WOFF2 is the smallest and loads fastest.
- Up to 4 fonts, one per weight and style. For example, add a Regular (400) and a Bold (700) file under the same font name.
- Only Shopify Files URLs are accepted. Font URLs from other hosts (including Google Fonts URLs) and fonts from Shopify's own font library are not supported. OrderFlow shows an error under the URL field and adds nothing.
- Your fonts load with
font-display: swap, so text stays readable in a fallback font while the file downloads. A font you add yourself is never loaded from Google Fonts.
Fine-tuning controls:
- Label style — Sentence case (default) or UPPERCASE for form field labels, such as the Paste SKUs and CSV column labels.
- Label letter-spacing — 0 to 0.15em of extra space between label letters. Uppercase labels usually look best with a little tracking, such as 0.05–0.1em.
- Input border — None, 1px (default), or 2px borders on the search box, quantity steppers, and form inputs.
- Button style — Filled (default) or Outline. Outline buttons have a transparent background with your primary colour as the text and border, and fill with the primary colour on hover.
Outline buttons use your primary colour for their text, so check that it reads well on your card background. Every control left at its default changes nothing on the page. If you move to a plan without these features, the order page returns to the system font and filled buttons, but your saved fonts and settings are kept and apply again when you upgrade.
Custom CSS
For advanced customization beyond what presets and tokens offer, the Custom CSS section gives you a raw CSS textarea. This section is collapsed by default under an "Advanced" disclosure to keep the interface clean for merchants who don't need it. The "Show custom CSS" toggle works with the keyboard and screen readers, which announce whether the section is expanded or collapsed. To remove your custom CSS, clear the textarea and save.
Any CSS you write here is injected as a <style> tag on the proxy page after all default styles. This means your rules take precedence and can override any built-in styling. You can use this to hide specific elements, adjust spacing, add hover effects, change font sizes for specific components, or apply any other visual modification that the token system doesn't cover.
Custom CSS is applied exactly as written — there is no sanitization, minification, or transformation. This gives you full control but also means you should test thoroughly after making changes. Malformed CSS can break the layout, and overly broad selectors can have unintended effects. Use your browser's developer tools to inspect elements and write precise selectors.
A few practical use cases: hiding the "Powered by OrderFlow" badge on the Plus plan, adding a custom background pattern or gradient, increasing the font size of product names for accessibility, or adding a colored left border to cards for visual emphasis. If you find yourself writing a lot of custom CSS, consider reaching out to us — the feature you need might be worth adding as a first-class token.